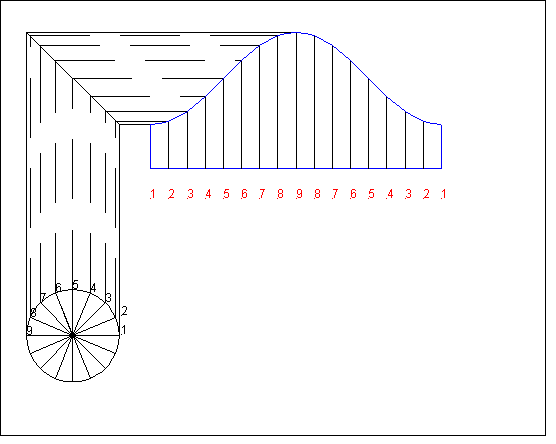
Here is a brief example of making a pipe template using parallel line
development. The example below is for a mitered elbow on 2-3/8" OD Tubing.
Here is how I do it:
- Draw a view of the pipes that shows the angle of intersection.
- Draw a circle under the vertical pipe and divide it into 16 equal spaces
and number as shown.
- Extend vertical lines from the point where the lines drawn in #2 intersect
the circle to the angle of cut.
- Obtain the circumference of the pipe by multiplying the diameter X 3.1415.
- Draw a line to the right of the vertical pipe that is below the lowest
point on the angled cut. The length of this line will be that obtained in
step 4.
- Subdivide the line drawn into 16 equal segments and number the lines 1 to
9 then back down to 1 as shown.
- Intersect the numbers as show. (1 to 1, 2 to 2, 3 to 3 etc..)
- Draw a line through these intersecting points as shown then cut out the
template.
- Wrap the pipe and mark and counterpunch.
- Cut with a torch keeping the tip pointed towards the imaginary
intersection of the two pipe centerlines .
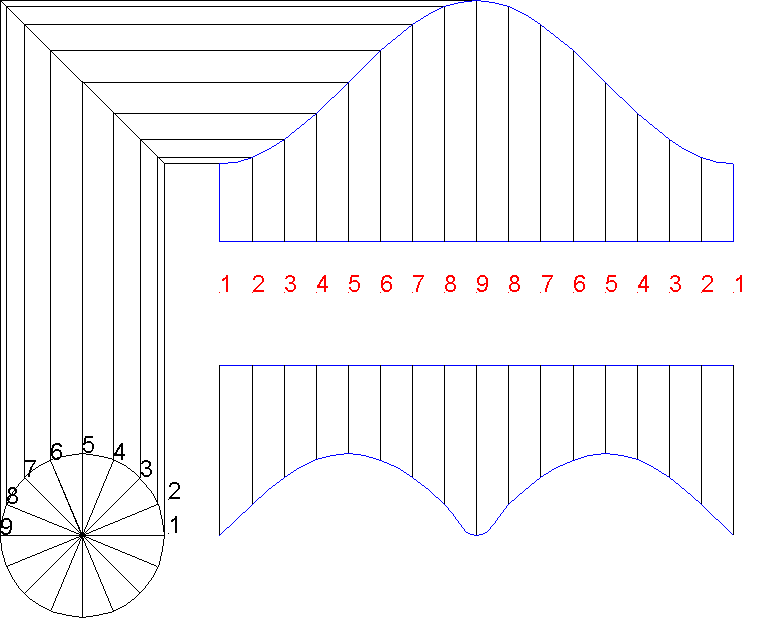
This method works for branch connections with some modifications. As
shown below, for a 90 Deg Branch Connection its just a matter of transferring
the lines from the lower circle. If the branch were other than 90 degrees, you
would lay it out the same way except from the view that would show the angle of
intersection.
 Since 27 Feb 03
